Conducting QMS Audits
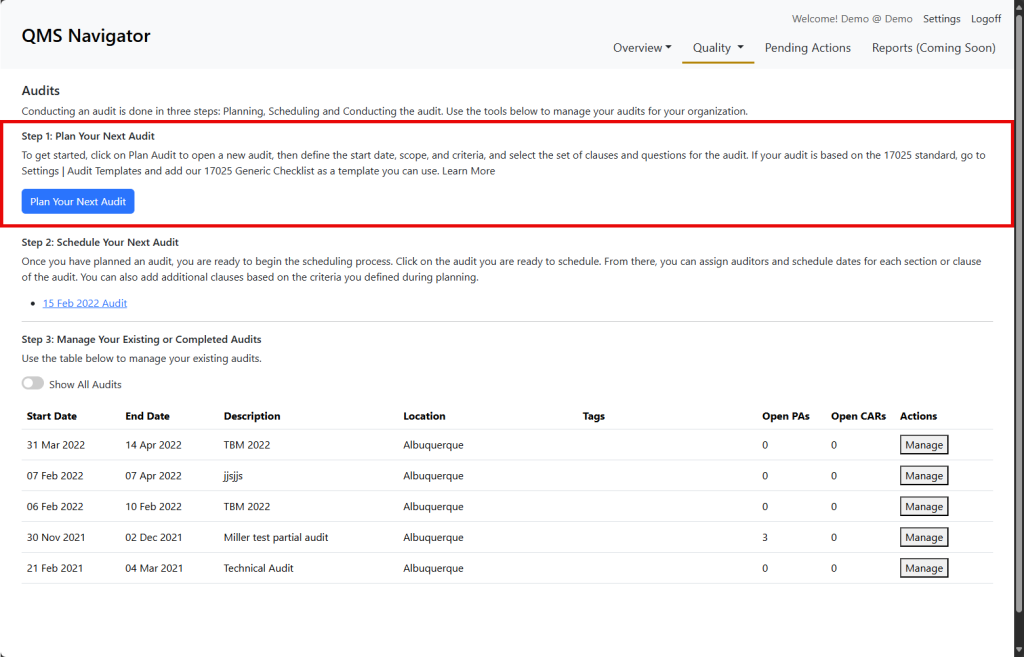
- Select Audits from the QMS Navigator menu under Quality.
- The audit module is broken up into three parts. Click the Plan Your Next Audit button to get started.
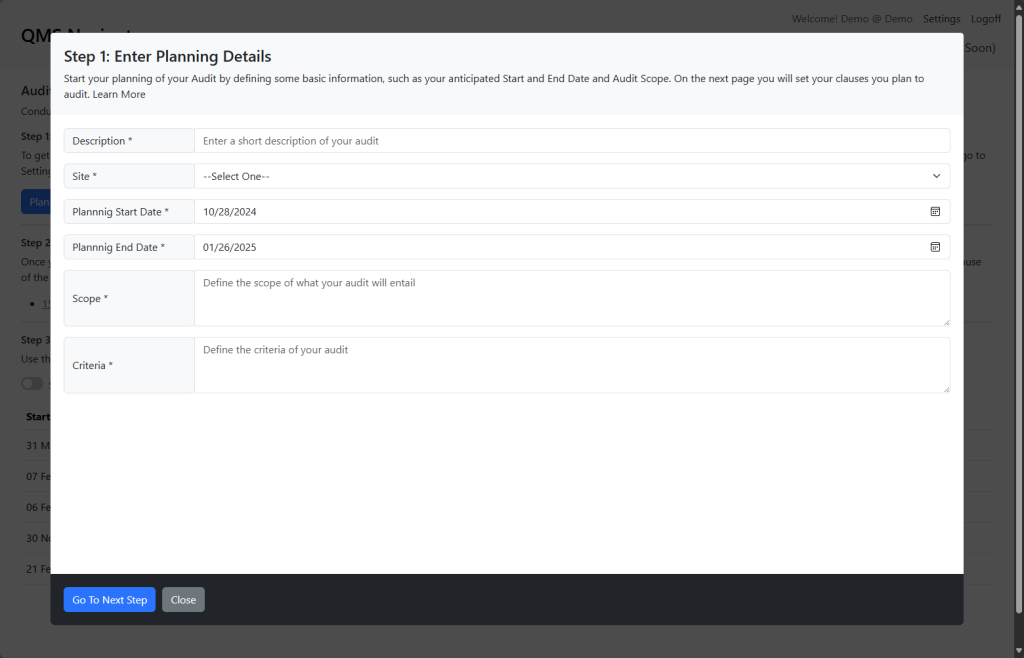
- In Step 1, provide all of the required fields.
- When you are satisfied with your initial data entry, click Go To Next Step.
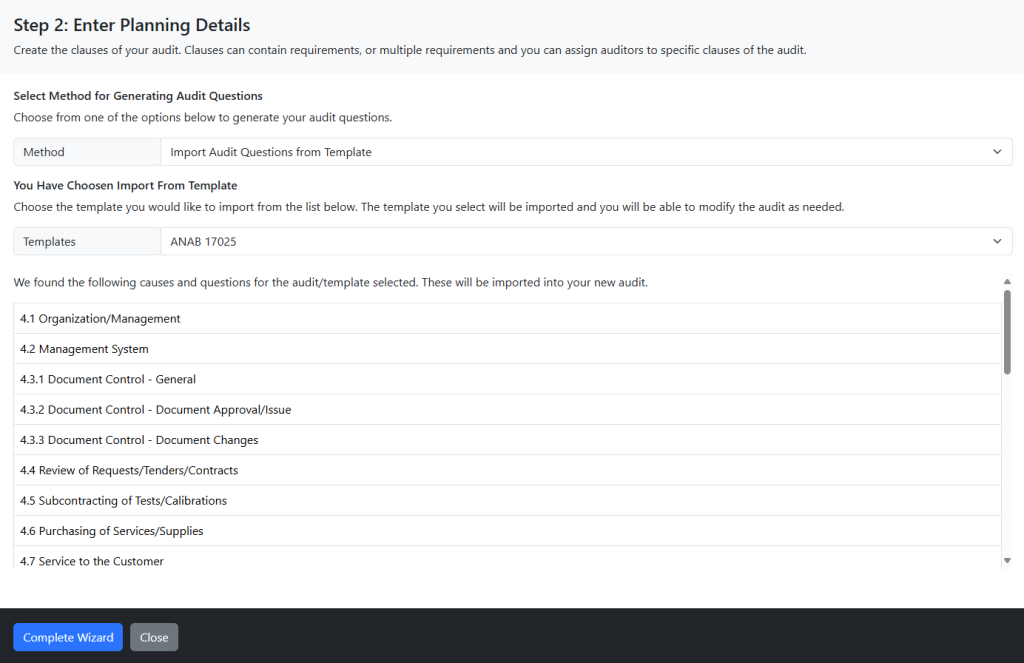
- Step 2 is related to how you plan to create the Clauses, Requirements and Questions in your audit.
- Selecting to copy or import an existing template, once you have selected the item you wish to copy into your new audit, you will see a list of all the clauses that will be imported.
- Once you have selected how you wish to create your Clause and Questions, choose Complete Wizard.
- Under Step #2, find the audit you wish to schedule. Click on the audit description.
- Go to the Clause & Schedule Tab. Here you will see all of the Clauses that were created as part of the initial planning process.
- Under Step #3, find the audit you wish to perform. Click Manage.
- Go to the Perform Audit tab. Before you can start and perform your audit you must answer some basic questions.
Step 1: Planning Your Audit
To plan your audit, follow these steps.
Plan Your Audit

Note: Make sure to create any Audit Templates prior to starting the Plan Audit Phase.
Step 2: Schedule Your Audit
In QMS, you first schedule all aspects of your audit and then you conduct the audit. This document will detail how to accomplish each task.
Schedule Audit
After you have gone through the initial planning stage of your audit, you need to schedule each clause of your audit.

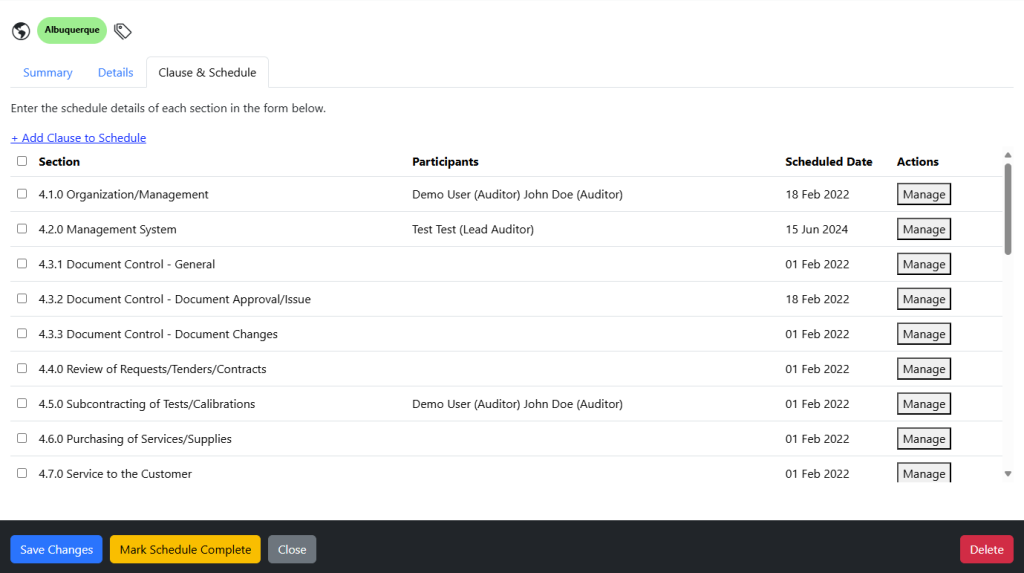
NOTE: If you need to add a new section to this audit, you can click Add Clause to Schedule and follow the form to add another clause.
Set Schedule
There are two ways to set the schedule and manage the participants in the audit.
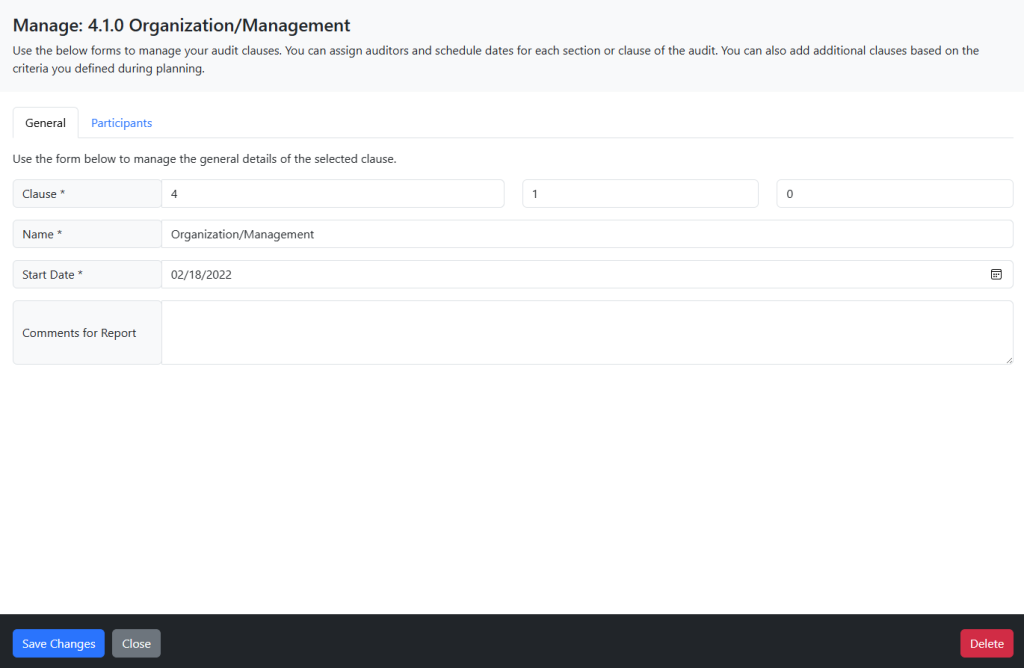
Option A: Click on the Manage Button next to each clause. On the resulting screens enter the schedule date.
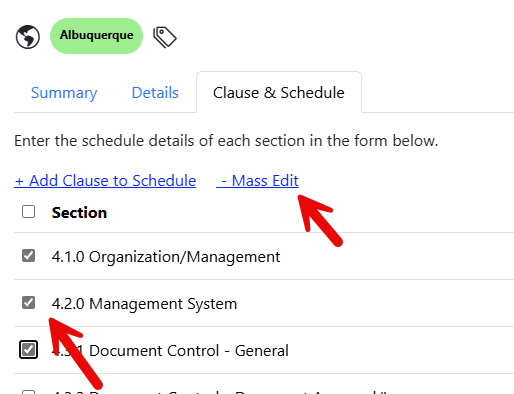
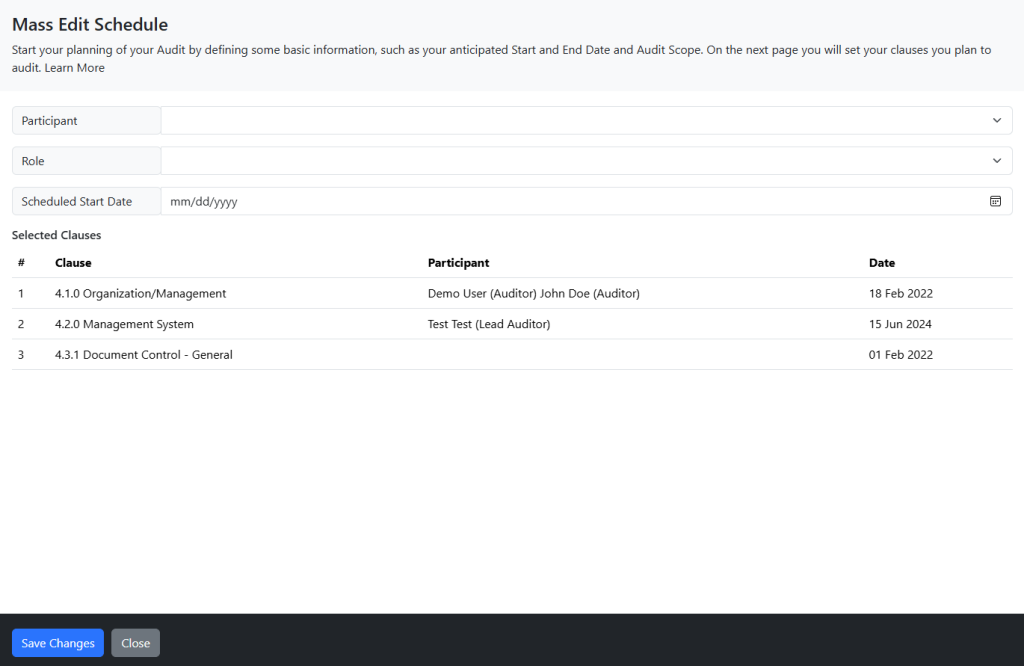
Option B: Use the mass edit option to schedule several clauses and sections at once. Select the clauses via the checkmark next to the name and click Mass Edit.
On the resulting screen, select the participants and roles AND/OR scheduled date you would like to apply. Click the Save Changes button when completed.
Once you have finished setting the schedule for your Audit, click the Mark Schedule Complete button to move to the next step.

Conduct Audit
After you have gone through the initial planning stage of your audit, you need to schedule each clause of your audit.
Step 3: Perform Your Audit
In QMS, you first schedule all aspects of your audit and then you conduct the audit. This document will discuss the process of conducting your audit.
Perform Audit
After you have gone through the initial planning stage of your audit, you need to schedule each clause of your audit.

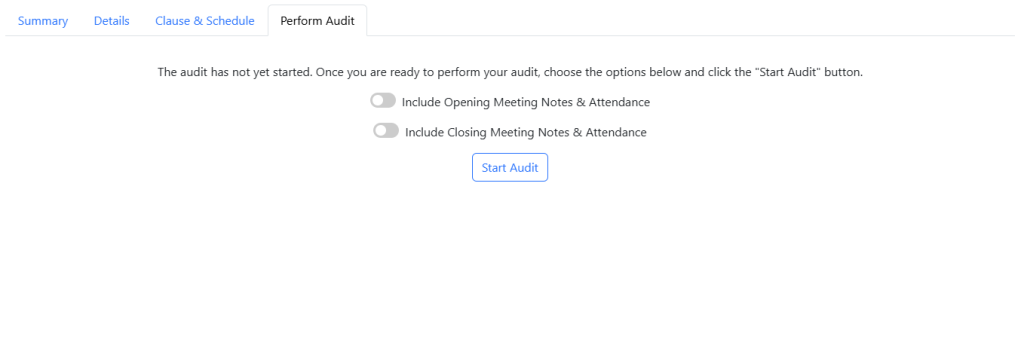
Once you are ready, click Start Audit.
Response to Audit
Each audit clause and section has a series of questions that need to resolved. On the Perform Audit tab, you will see a list of each clause and section.
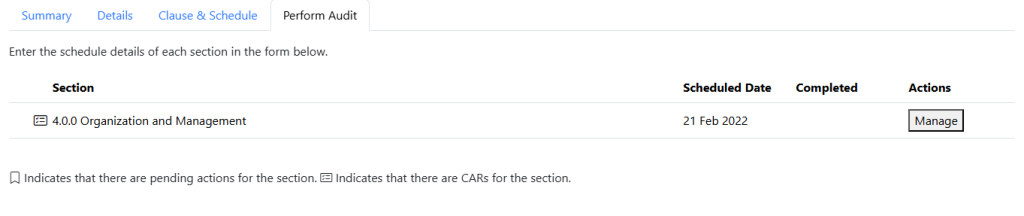
Click on Manage next to the clause you wish to complete.
On the resulting screen, ensure all details are correct on General and Participants. Click on Questions to review each question. You can enter the response for each item.
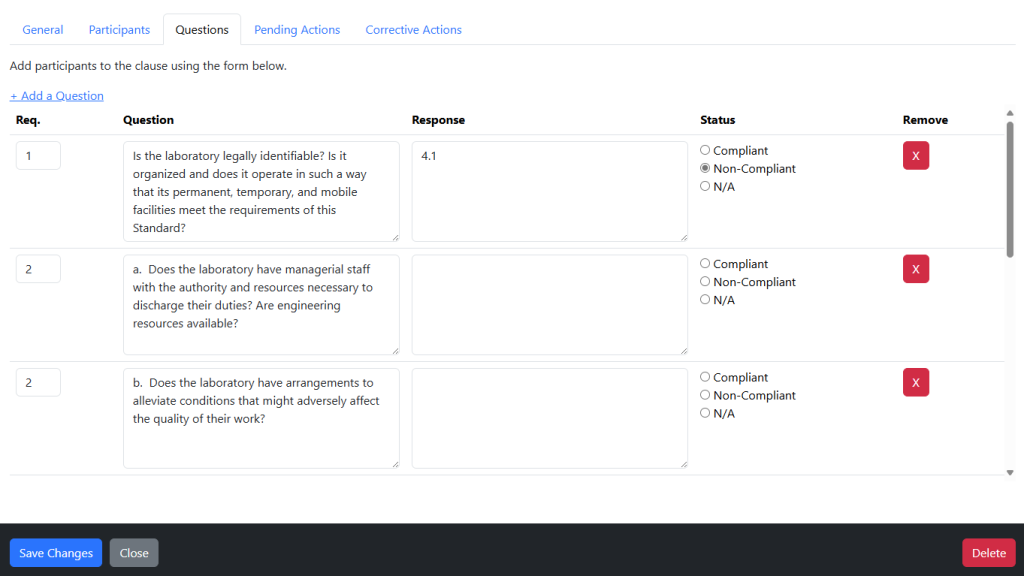
If you need to add a question, simply click the Add a Question link at the top. Once completed, click Save Changes.
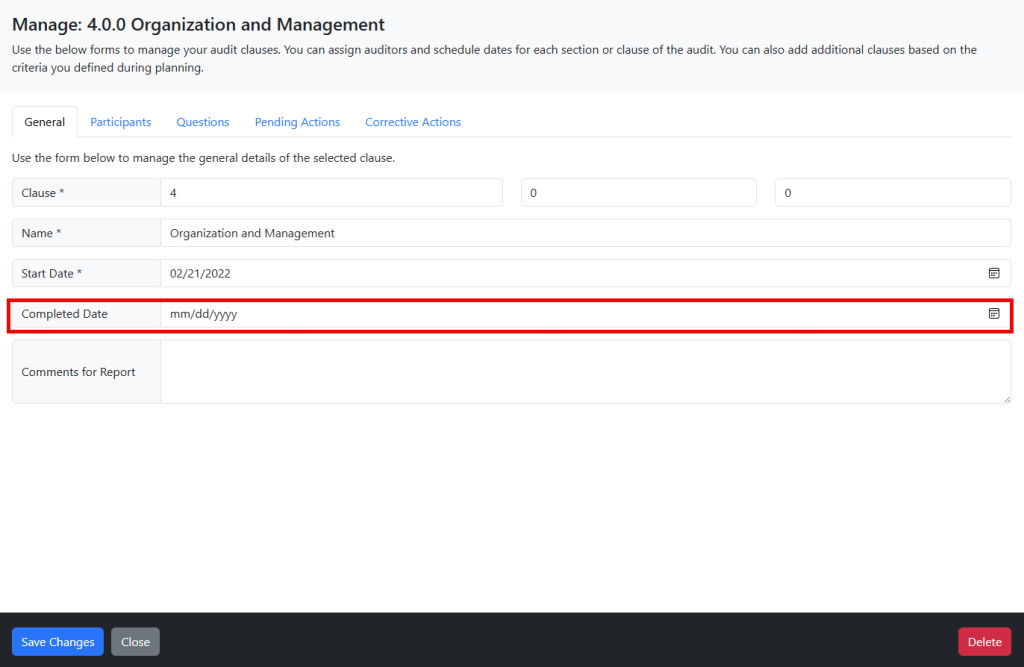
Completing A Clause & Section
In order to complete an audit, each section must be marked as complete. Once you are satisfied with a section, simply click on Manage on the General Tab enter the completed date and click Save Changes.
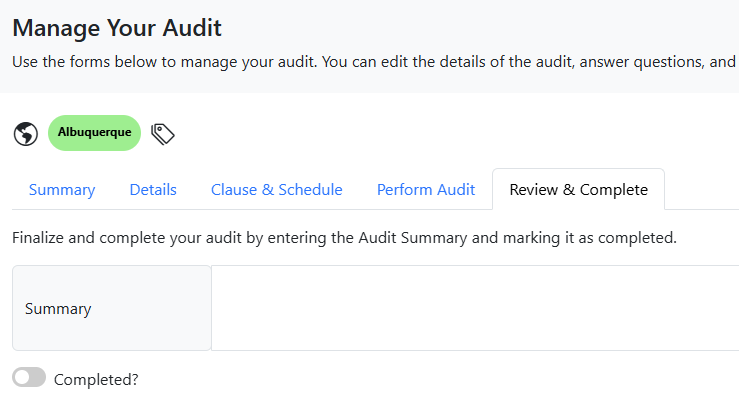
Mark Audit Ready For Review
Once the audit is completed and all clauses and sections are completed, you can click on the Audit Ready For Review button to finalize the audit.

Mark Audit Complete
Once you click the review ready button, you will see the Review & Complete tab. Enter any comments and click the Completed? slider, then click Save Changes. Your audit is now marked as completed.