
Understanding the ILC-PT Process
Thank you for ordering from NAPT. We are here to make your journey in ILC-PT as easy as possible. Our customer portal is a hub of information that will help walk you through the entire process from ordering, accepting, and performing your ILC-PT.
The ILC-PT Process
At NAPT, we break the process into eight steps which can be seen below. The NAPT Customer Portal allows you, as the customer, to move the process along automatically to increase the speed of your ILC-PT.
Each step has a dedicated help guide to describe exactly what is happening along your ILC-PT journey. Please read on for in-depth guidance on each step of the journey.
Table of Contents

Order a new ILC-PT
The first step in our ILC-PT Journey is to order your next ILC-PT from NAPT.
Steps to Complete:
- Login to the Customer Portal
- From the top menu, make sure to click ILC-PT
- From the left menu, select Order Now

On the resulting form, select the ILC-PT you wish to enroll in.

If you need to order multiple items, you can select the Add Another ILC-PT. You can order up to six (6) ILC-PTs at the same time. Once you have selected your ILC-PT, choose Next Step.
On the next screen, enter the contact and shipping details for your Order.
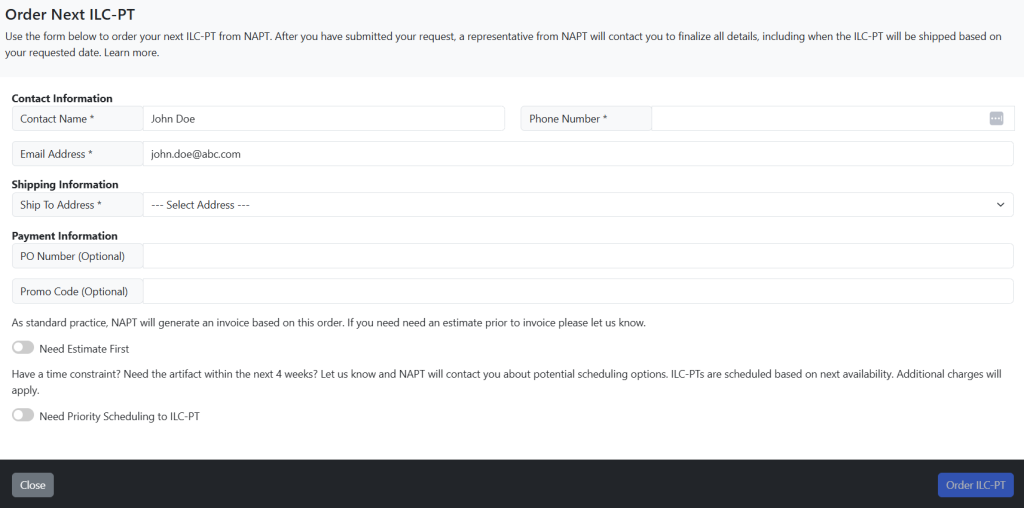
Near the bottom are items you can highlight for NAPT to be aware of:
- Need Estimate First: NAPT standard practice is to send an Invoice upon order. If you first need an estimate for accounting purposes, use this option.
- Need Priority Scheduling: If your ILC-PT requires priority scheduling, you can select this. If NAPT is able to fulfill this request, our office will contact you and let you know the additional cost and timeline for this ILC-PT.
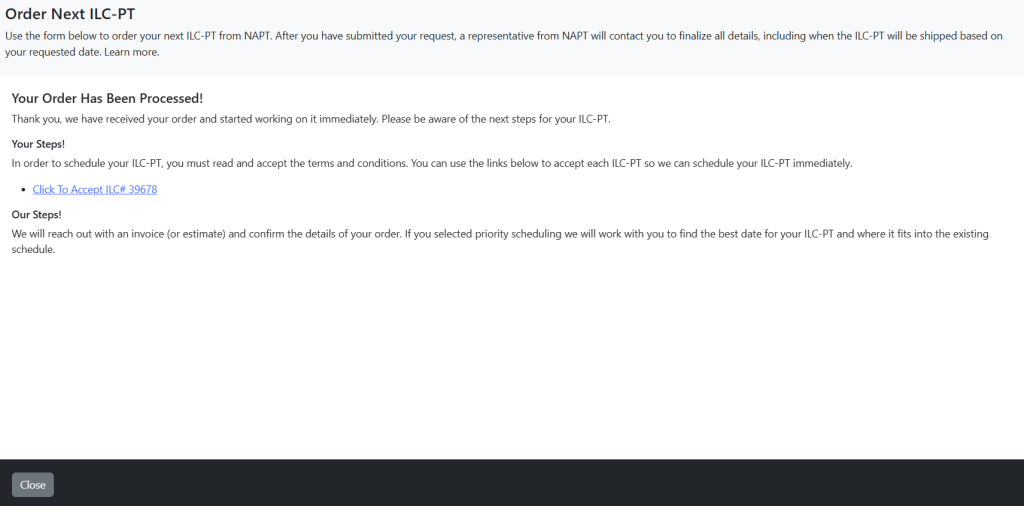
When complete, click Order ILC-PT. Once your order is completed, you will see a summary page.
Once an ILC-PT has been ordered, the next step is to Accept it. You can do this directly from the Order Page.
Status: Accept ILC-PT
When your ILC-PT is in the Accept ILC-PT status, we are waiting for you to confirm that you accept the details around the use of the ILC-PT assigned.
NOTE: ILC-PT can be accepted by an Account Admin, Quality Manager or if the ILC-PT is assigned directly to the logged in technician.
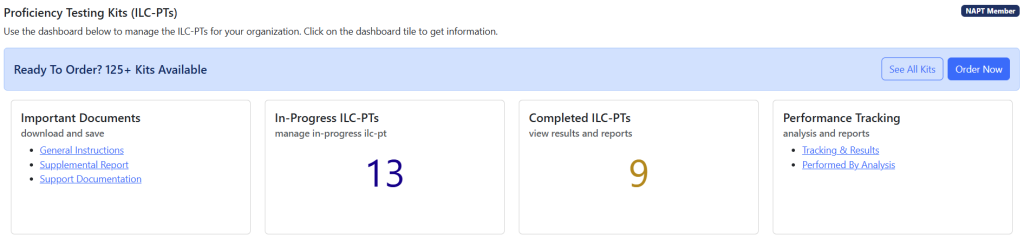
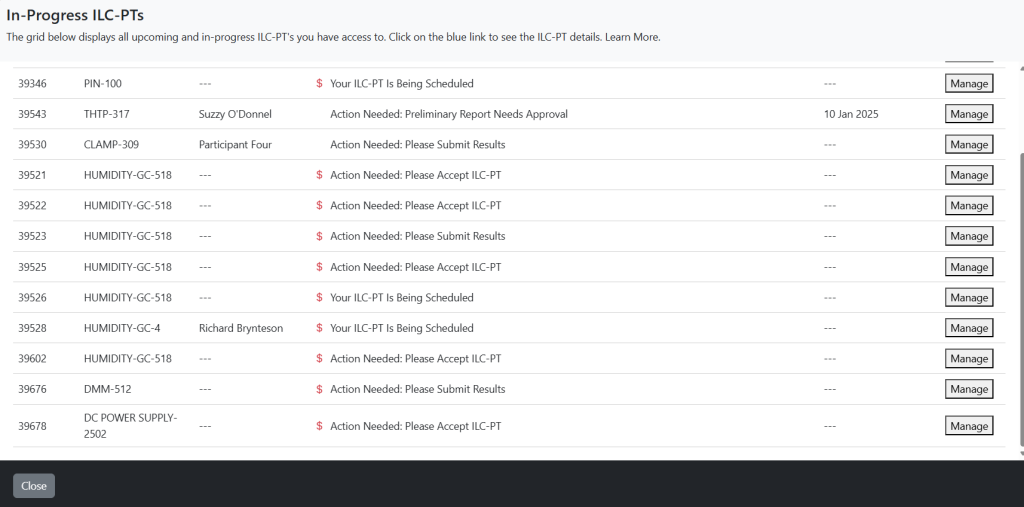
Select In-Process ILC-PT and click anywhere in its box. On the resulting page, find the ILC-PT marked as Please Accept ILC-PT. In this case, it is the last item.
On the resulting form, you can review the IS / DRS and any other documents assigned to this ILC-PT. If you are comfortable with all the information, click the Accept ILC-PT Kit button.
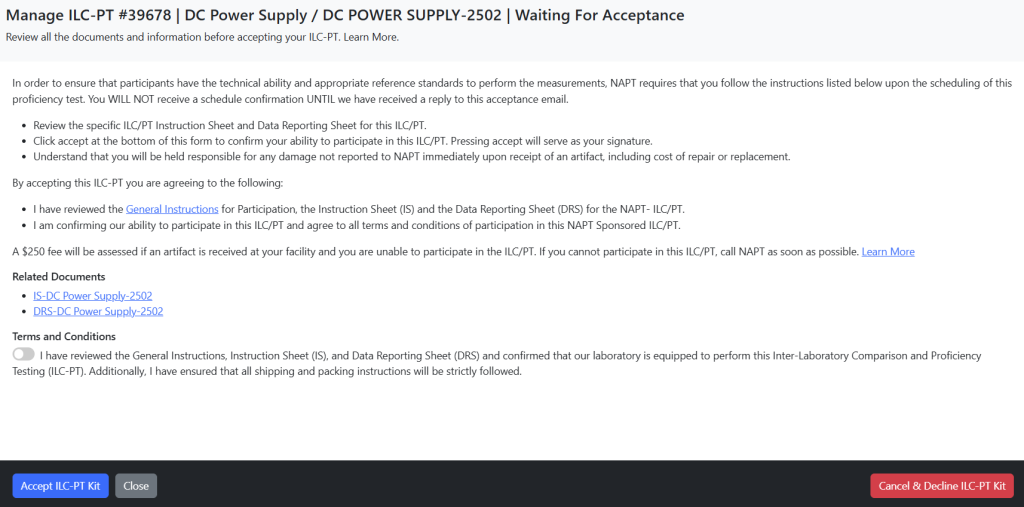
The status of the ILC-PT will change to Waiting for Kit. We will work with you to schedule the delivery of the ILC-PT. If you do not need to perform this ILC-PT, you can choose Cancel & Decline ILC-PT Kit.
Status: ILC-PT Shipped
When your ILC-PT is in the ILC-PT Shipped status, your ILC-PT is out for delivery and expected to arrive at your site soon.
From the In-Progress ILC-PT view, you will see:
Find the item marked as Action Needed: Your ILC-PT is on its way. Tell us when it arrives. Click on Manage.
On the resulting form, you can see the inbound tracking ID Number. Additionally, you can indicate when the ILC-PT has arrived at your site. Our receiving form has been simplified. All you need to do is indicate the status of the Artifact and Kit.
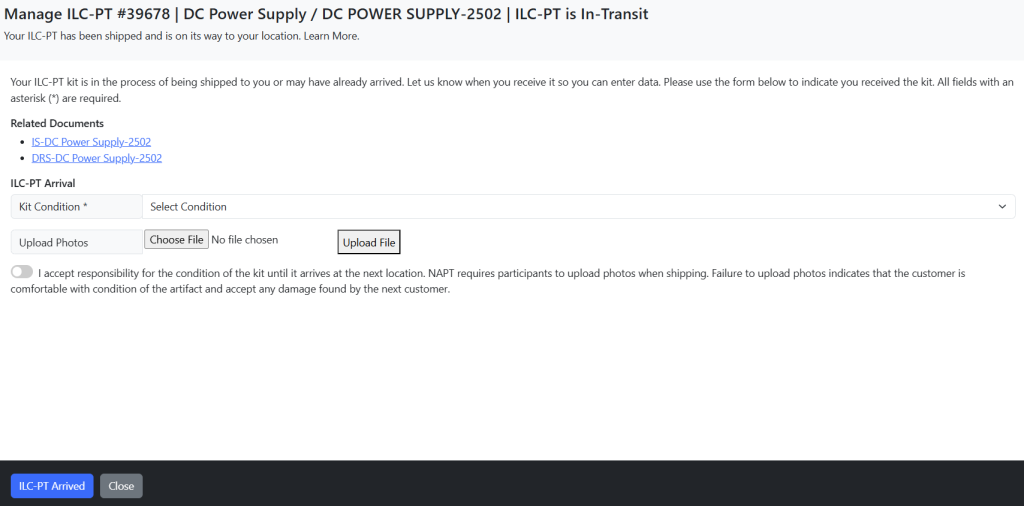
You can mark the Kit Condition as Good, Damaged or Missing Parts. If you select Damaged or Missing Parts, we require you to enter a note and photos.
When you mark the Artifact as arrived, the status of your ILC-PT will be changed from On Site – In Transit to On Site. This allows you, as the customer, to immediately start entering data for your ILC-PT.
NOTE: ILC-PT can be marked as Arrived by an Account Admin, Quality Manager or if the ILC-PT is assigned directly to the logged in technician.
Status: Submit Results
When your ILC-PT is ready to Submit Results status, NAPT staff is waiting for you to submit your data and associated shipping information. When you click on your ILC-PT you will see the following page.

You can select what action you want to take. In the above there are four possible actions:
- Submit Shipping and Data
- Submit Data Only
- Submit Shipping Only
- Get Sharable Link
In this case, we will select Submit Data Only. On the resulting page:
STEP #1: Add Performance Information
On the resulting form, add the performed date, who performed the ILC-PT and any submission notes. If the person is not listed, select “technician not selected” and enter the information into the submission notes
Make sure to note if your lab is accredited and if so, by which accrediting body.
STEP #2: Enter Your Data
On the resulting form, enter your submission data. If you did not perform a test for a specific measured value, leave it blank.

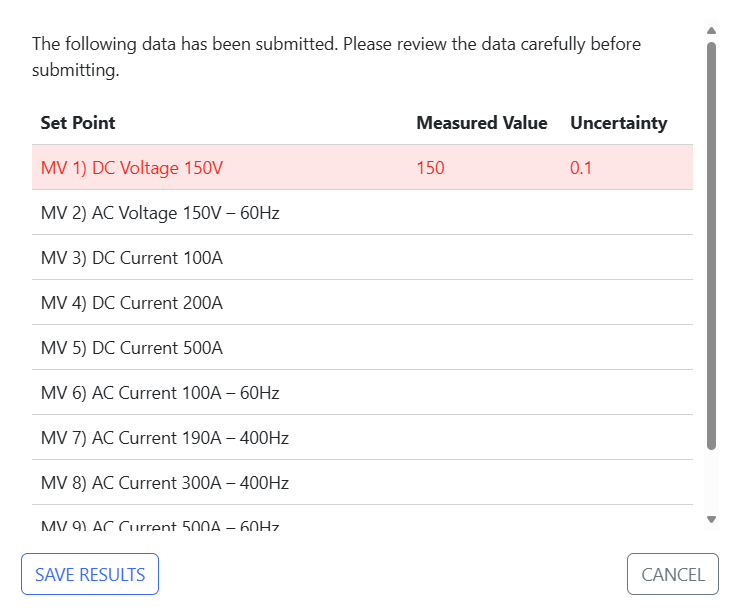
When you click Review and Confirm Data, you will see a page to validate your selection. If an item is in red, NAPT has automatically flagged that measured value for review. If a kit is new, this might happen more frequently. For an established ILC-PT, it will flag less often.
If an item is marked as red, NAPT recommends you double check the values before submission.
NOTE: ILC-PT can be marked as Arrived by an Account Admin, Quality Manager or if the ILC-PT is assigned directly to the logged in technician.
Status: Accept Preliminary Report
When your ILC-PT is in the Accept Preliminary Report status, NAPT staff is waiting for you to accept the results of your Preliminary Report and issue your Final Report
On the resulting form, you can accept your Preliminary Report or Submit Revised Data to NAPT if deemed necessary.

When you Accept Prelim Results, the ILC-PT will be moved to Complete, and your Final Report will be ready to print directly from the NAPT Customer Portal.
NOTE: ILC-PT can be marked as Arrived by an Account Admin, Quality Manager or if the ILC-PT is assigned directly to the logged in technician.
Status: Submit Revised Data
After you have submitted your results, there might be a need to submit revised data. If the ILC-PT is currently On Site or you have not yet accepted your preliminary data, then you can easily submit revised data via the NAPT Customer Portal.
Step #1: Go to the Customer Portal | ILC-PT and find the ILC-PT you wish to submit revised data for.
Step #2: Click on Submit Received Data. On the resulting form, check the box next to each set point which you want to submit revised data for.
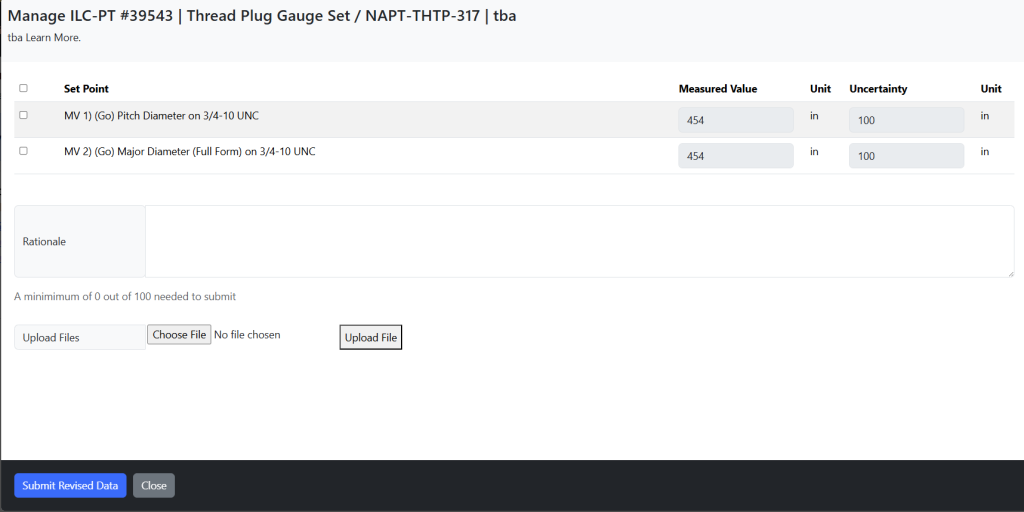
NOTE: The rationale is required by 17025 and must explain why you are requesting the change in values.
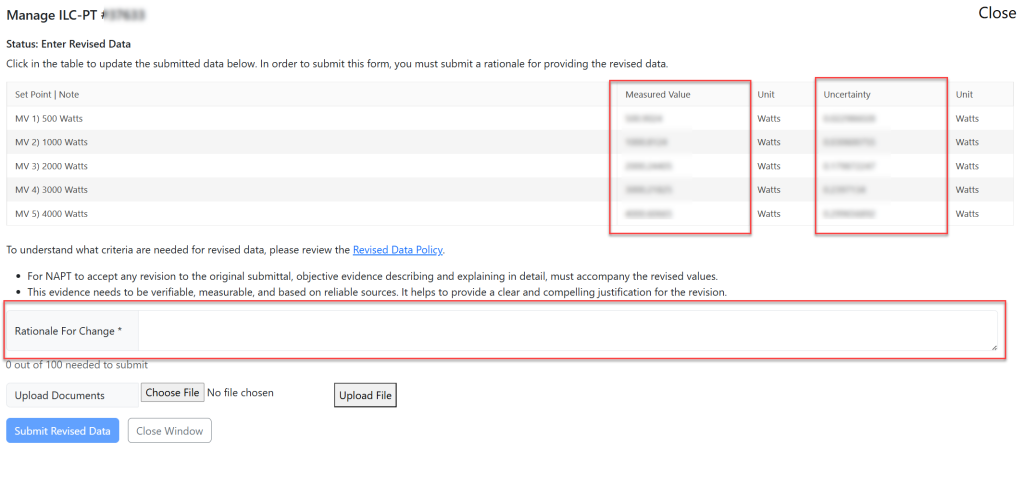
Once you have updated the value, enter the rationale for change and upload Root Cause Analysis supporting documentation. Your ILC-PT will go directly into Technical Review. The data will NOT appear in the portal immediately as a technical advisor must review the revised data as it is submitted.
When submitting a revision to data for a Metrology Proficiency Test (PT) that complies with ISO/IEC 17043 and ISO/IEC 17025 requirements, the rationale provided should be clear, relevant, and verifiable.
The Rational for Change needs to have a length of at least 100 characters and is a short summary; clearly stating why the revision is necessary. This summary alone does not provide adequate objective evidence for the requested change and revised data will not be accepted.
Additional objective evidence documenting the investigation into the error, including supporting objective evidence is required to be uploaded.
Types of objective evidence:
- Supporting Calculations or Documentation
- Calculation Sheets: Screenshots or exported files showing updated calculations or formulas applied to derive the revised data.
- Measurement Uncertainty Analysis: Updated uncertainty budgets, if applicable, with documented changes.
2. Root Cause Analysis Documentation
- A formal report summarizing the root cause of the error in the original submission (e.g., instrument drift, operator error, software bugs).
- Evidence supporting the analysis, such as logs, error reports, or correspondence with relevant stakeholders.
3. Corrective Action Evidence
- Revised Standard Operating Procedures (SOPs): If procedural errors were identified, include updated SOPs with changes clearly marked.
- Training Records: Documentation proving additional training was conducted for personnel involved in the test.
Status: Data Submitted: Need Outbound Shipping Details
When your ILC-PT is in the Data Submitted: Need Outbound Shipping Details status, NAPT staff is waiting for shipping information to be entered. Please use the Submit Shipping Only module to enter shipping information and the status will update. This step is required before the Preliminary Report can be accepted.
On the resulting form, shipping information can be entered.

Status: Completed
When your ILC-PT is in the Completed status, your report is ready to be printed. You can find completed reports on the left side menu of the ILC-PT module.
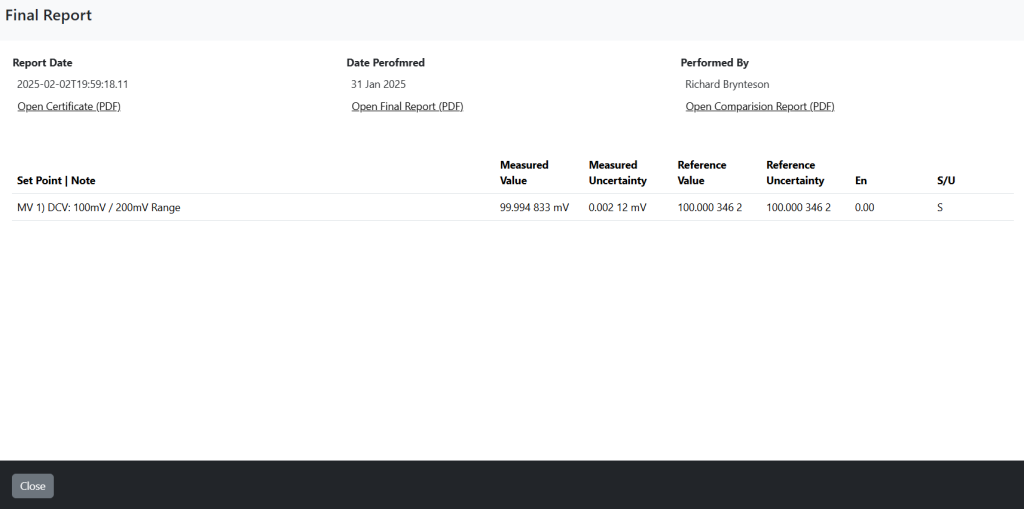
From the list of completed ILC-PT, select View Report.
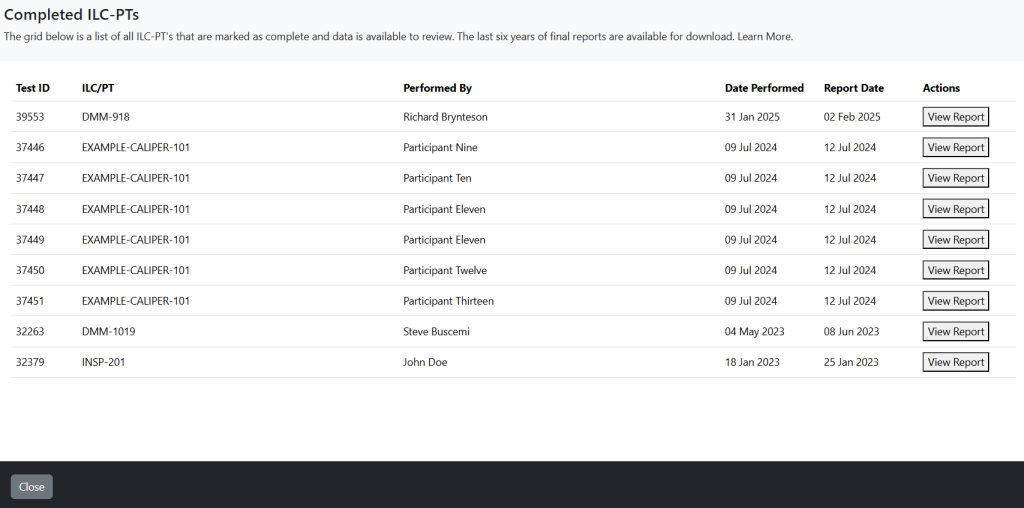
On the resulting form, you can see the data submitted and print your final report.
NOTE: ILC-PT can be marked as Arrived by an Account Admin, Quality Manager or if the ILC-PT is assigned directly to the logged in technician.