
Lab Assessment scores the laboratory as a whole. For what Risk Management includes, see Risk Management. Parameter scoring is covered in PT Risk.
Risk Factor Categories
Risk Management starts with ten categories, known as Risk Factors. Each factor is scored on a scale from 10 (Optimal Risk) to 1 (High Risk). Organizations use their internal procedures to determine appropriate scores for each category.
Account administrators can rename a category, edit its description, or remove it from the assessment in Framework Settings.
The 10 Risk Factors are:
- Organizational Context
- Scope of Accreditation
- Workload
- Staff Capabilities
- Laboratory Resources
- Changes in Standards, Equipment, and Methods
- Proficiency Tests: Past Failures
- Audits: Technical Findings
- Technician Training
- Certificate or Report Errors
Getting Started
Access Risk Management by visiting the NAPT customer portal at https://customers.qmsnavigator.com and choosing Risk. If you do not have an account, you can create one or contact your organization’s admin if you are an existing NAPT customer.
When you first open Risk Management, all categories are assigned a default score of 5 (Moderate Risk). On this scale, a higher score means lower risk.
Each Risk Factor contributes to an overall weighted score. By default, each category accounts for 10% of the total score, but these weights can be adjusted based on your organization’s priorities. Account administrators use Factor Weights. Other users use View Settings. The weights must total 100% before they can be saved.

Updating Risk Factors
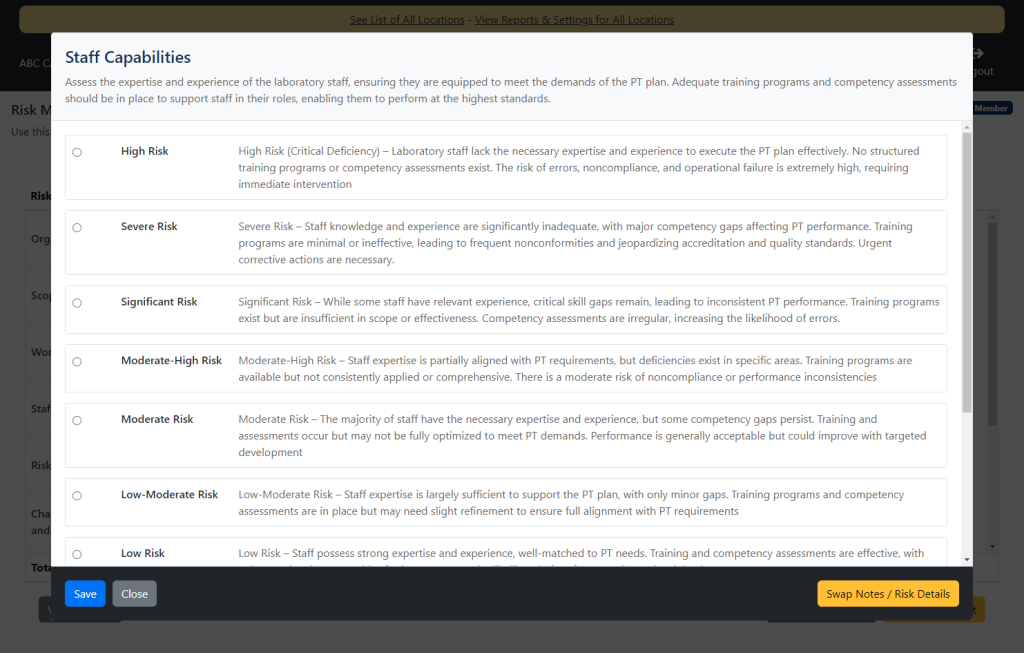
On the Lab Assessment page (as shown above), click Update Details next to a Risk Factor. For example, selecting Staff Capabilities opens a screen where you can choose the risk level that best reflects your current status.
Repeat this process for each category included in your assessment.
Within each Risk Factor, click Swap Notes / Risk Details to enter notes and details that document your analysis. Click Save. The score and notes are stored immediately and are included in later reports and summaries.
Framework Settings
Account administrators can change the score range, the wording of each score, and which categories appear. See Framework Settings.
Finalizing the Assessment
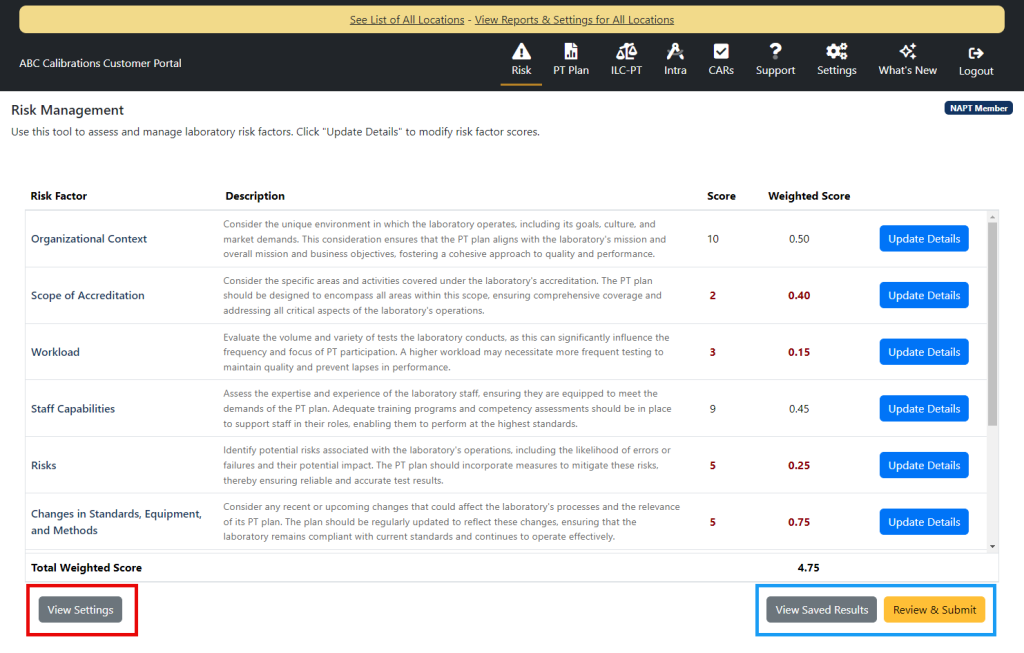
After you have scored the categories you are including, click Review & Submit.
This step allows you to review your organization’s overall risk score. It is recommended that you submit the assessment according to your organization’s risk tolerance—typically every 6 to 12 months.
If a lab assessment was already submitted within the last 30 days, a warning appears before another snapshot is saved. Choose Submit Anyway to add a new snapshot, or Go Back to keep the earlier one. This reminder applies only to lab snapshots.
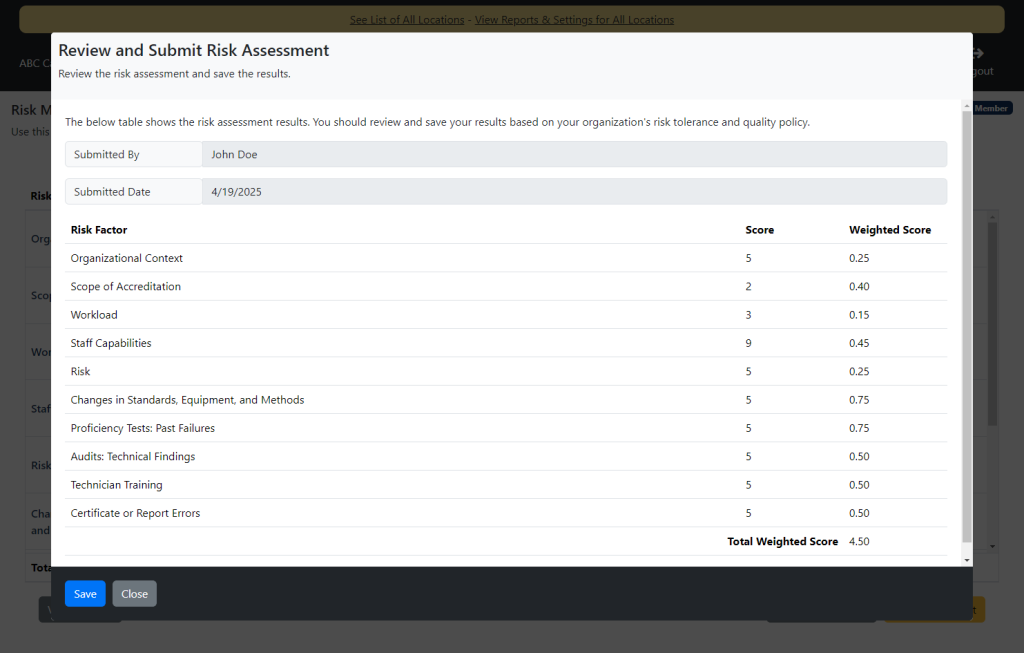
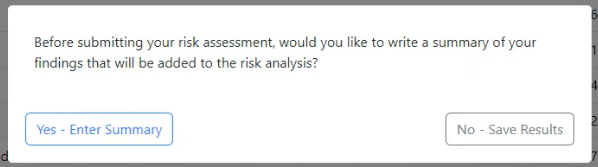
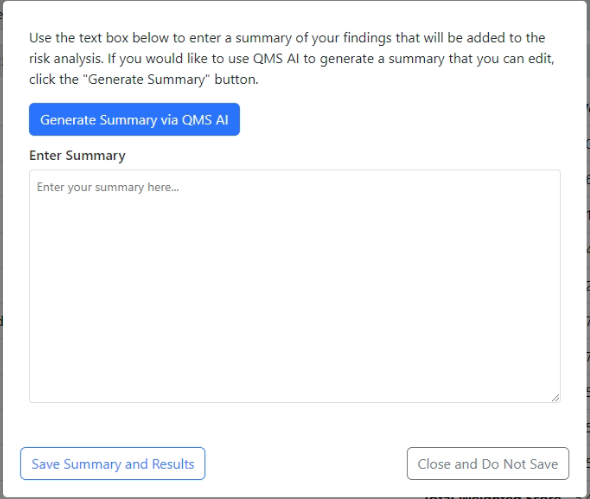
Click Save. You will be asked whether to enter a summary of your findings. Choose Yes – Enter Summary to write one, or No – Save Results to store the snapshot without a summary.
If you enter a summary, type it yourself or click Generate Summary via QMS AI. QMS AI writes a summary from the scores, descriptions, and notes you entered. You can edit the text after it is created. Then click Save Summary and Results.
Running Reports
Saving the assessment captures a snapshot of your current risk profile. You can view your historical submissions by clicking View Saved Results. Open a row with View Details to see the report, choose Save As PDF, or choose Delete Analysis. Deleting an analysis cannot be undone.
The dashboard Risk panel shows the latest saved lab snapshot, including the score, risk level, and who submitted it. Submit with Review & Submit when you want the dashboard to show the new result. PT Risk snapshots are not included in this panel.
